|
Here is a project that I just had to personally do after seeing it in one of my Backwoodsman magazines a while back.
This is basically a wood burner that is made using two propane tanks as the main components. While this thing can't
(or shouldn't) be used to heat a house, it can make a halfway decent outdoor cooker or even be used to heat up a little nomad
type camping trailer.
This stove started off with two scrap propane tanks I picked up for nothing at the local scrapyard. I had to open
the valves to make sure there was no gas still in the tanks, I left the valve open for a few days to make absolutely sure
nothing was left in the tanks. I did try to screw off the valve, but they were both frozen on with loc-tite so they
were not coming off. I tried using a pipe wrench, but there was nowhere to grip the tank tightly enough to break the
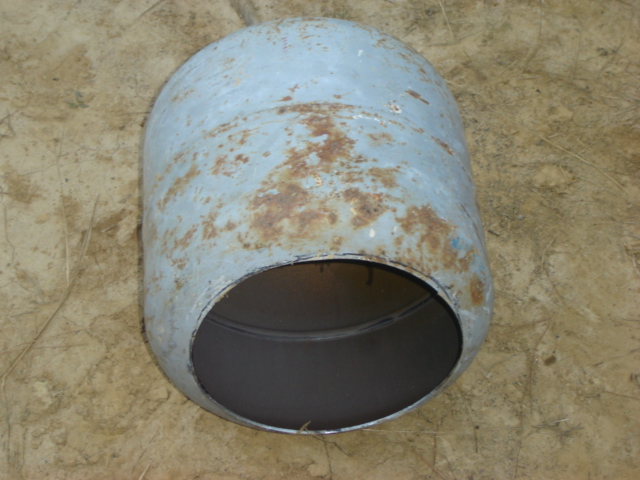
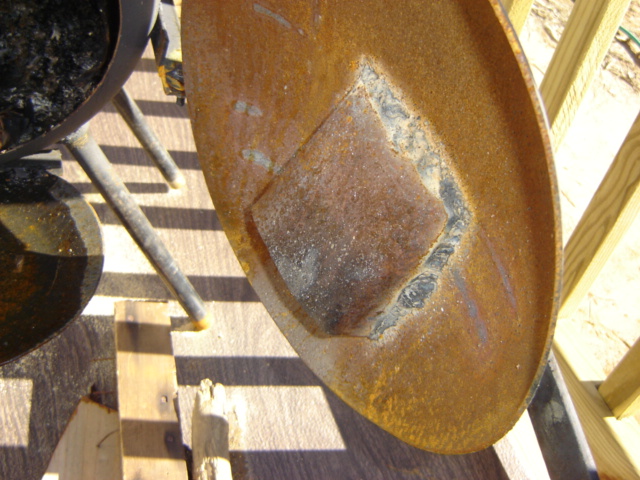
loc-tite and remove the valves, so I left the stupid things in place. I then drew a circle around the base of one tank,
since I had to cut a large circle in the bottom for the stove opening. After drawing the circle I used the trusty die
grinder to grind the welds to remove the base.
After grinding off the base I drilled a couple of starter holes and then reamed the space between the two holes to make
one elongated opening for my sawzall blade to fit. Afterward I went on to cut the circle out of the bottom of the propane
tank. Once the hole was cut, I used the die grinder to grind off the burrs and slivers in the hole to make sure that
I won't get a million slivers in my hands everytime I stick my hands in the stove.
The next thing I did was take the second tank and draw a circle around the point in the curvature of the tank where it
sharply angles, not curves, to the vertical side of the stove. Again I ground off the base and did the two drill holes
on the circle line and cut out that circle. This larger circle makes up the door of the stove.
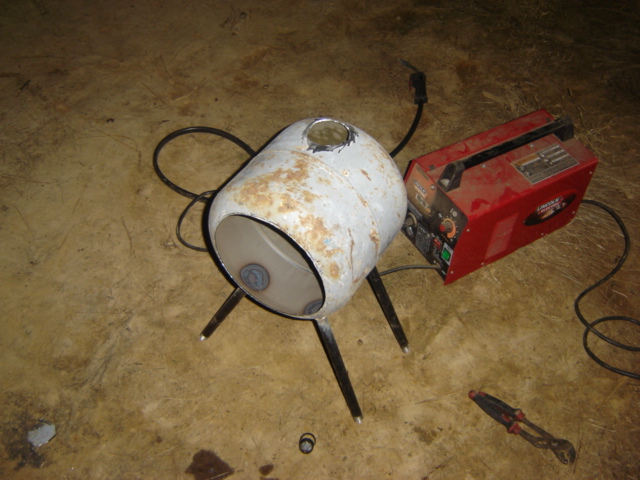
I set the future door aside then went on to start on the legs. The second propane tank went off to the side too,
who knows what I'll do with it, maybe I'll find another project that can make use of it in the future. Anyway, I took
two 1/2" pipe couplings and used the die grinder to cut the couplings in half. I also used the grinder to grind the
tank down to bare metal in four spots I marked, where I will weld the coupling halves to make the bases for the screw on legs.
After doing that preparation, I then welded the coupling halves onto the four spots on the tank (obviously they're not going
to be 100% perfect) and took four 12" long 1/2" pipe nipples and screwed them into the coupling bases to make up the stoves
legs.
|
| Bottom cut out of tank that will be the stove |
|
| Tank with couplings welded on and pipe nipple legs in place |
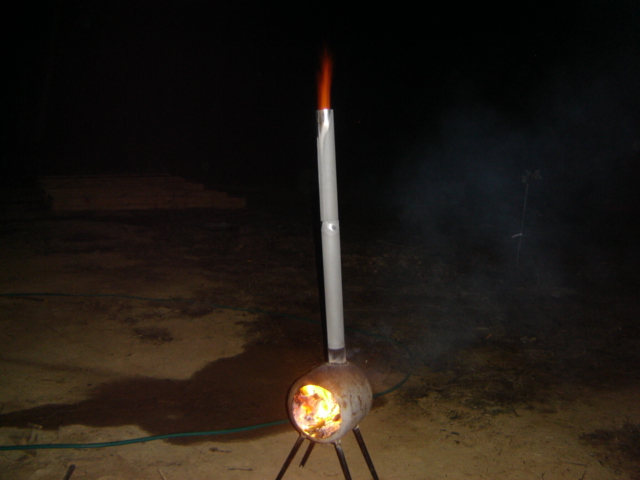
With the legs now in place on the stove, it was time to cut the hole for the stovepipe. I had to take some relatively
thin sheet metal (thin enough to bend into a 3" tube) and cut a length about 2" wide. Afterwards I matched it up to
the 3" galvanized pipe that would make the stove pipe. I made sure that the sheet metal tube was able to accomodate
the stovepipe in a snug manner, then welded the sheet metal tube together. Afterward I used the resultant tube to draw
a circle on the top of the tank stove near the old valve (back of stove), then took the die grinder and cut a hole as best
as I could do. Next I ground the area around the hole down to bare metal and went ahead and welded the sheet metal tube
over the hole. At this point I was able to put the galvanized pipe into the tube in preparation for the next step, which
was to fire up the stove. Since it was night time already, I wanted to see how the stove looked at night, plus I wanted
to burn off the outer layer of paint so I can spray paint the tank with high temperature paint later on, plus burn off the
zinc coating on the stove pipe. It was pretty cool how the burning materials in the stove created enough flammable vapors
in the stove pipe that the stove looked like it was belching fire like a blowtorch.
|
| Stove blowing fire out of stovepipe during first burn |
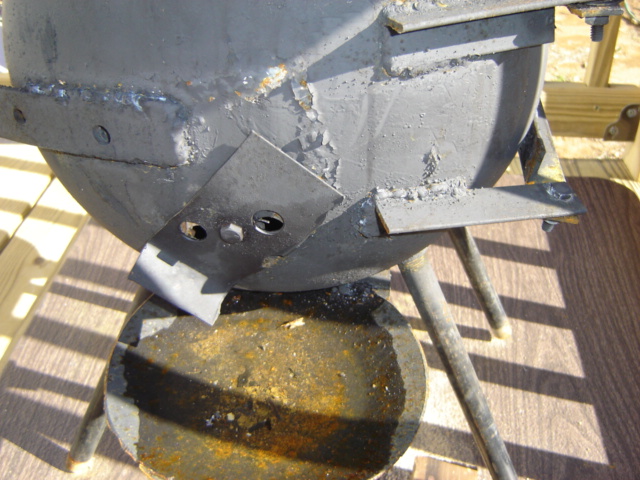
At this point I had to make the hinges for the main door. These were made from angle iron; two lengths of angle
iron were welded to the side of the tank with a couple of inches extending out in front of the tank. A hole was drilled
in the end of each piece. Next I cut two more lengths of angle iron and welded them to the tank bottom that is to be
the door, at the same distance apart as the two lengths on the tank stove body. Obviously I had to hold the tank bottom
against the front of the stove to line up the other angle iron to see exactly where to weld them. Anyway, I drilled
a hole in each end of those two pieces of angle iron. All four holes are of about 5/16" diameter. Next I took
two 5/16" bolts and nuts and washers and attached the new door to the stove via the connecting of the angle iron tips through
the holes. With that, the door was installed. The next thing I did to the door was to weld on a handle for easy
opening. This was done by welding on a length of scrap flat steel with a piece of angle iron welded on one end.
This metal came from some past project that was scrubbed a long time ago. Anyway I welded the length of iron to the
opposite side of the door from the hinges to complete that step.
|
| Angle iron hinges on stove with door bolted in place |
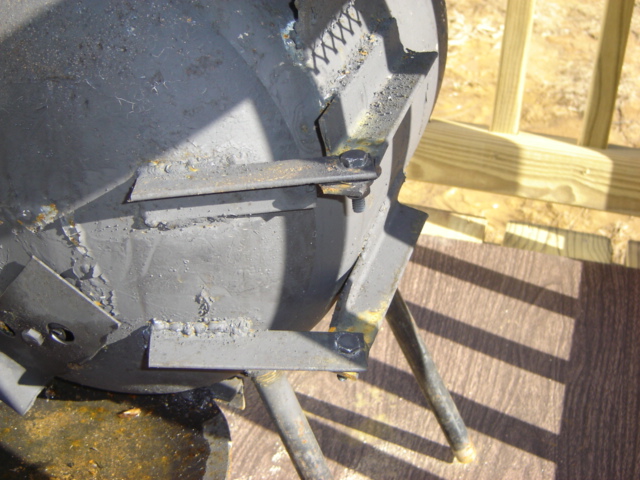
The next thing I did to the door now was to do the air intake vent. I drilled two large holes with a Unibit near
the bottom of the door. I then took another piece of plate iron and cut it to a length that allowed me to bend an inch
long tab, making the piece of iron look like an "L". Afterward I drilled a hole between the two Unibit holes then drilled
a hole in the middle of the plate iron piece. I had to bend the plate iron piece into a slight curvature to match the
curvature of the stove door. I used another 5/16" bolt to attach the plate iron to the door. This now made up
my new air intake damper. Last thing I did was take another piece of plate iron and bent two sides into the piece of
iron in a way where the piece looks like a lean to tent when placed against the inside of the door, where this piece of metal
is going to go. I welded it over the two Unibit holes, which will allow the fire to draw in air without flames (or hot
embers) trying to lick their way out through the damper to the outside.
|
| Spark shield welded over intake vent holes |
|
| Front shot of stove, note intake damper near ash pan |
As can be seen in the last picture, the next thing I did was weld on an ash catch pan to help make cleaning a bit less
troublesome. The ash pan was made from the piece of tank bottom that came from the main stove body. This was as
simple as just welding the thing in place under the door in the front. The last thing I did was make a cooking
surface. I took two pieces of angle iron and welded them on opposite sides of the stove near the top, so when I lay
the surface on the top, it will rest in a stable manner. It will also help support things like pots full of water or
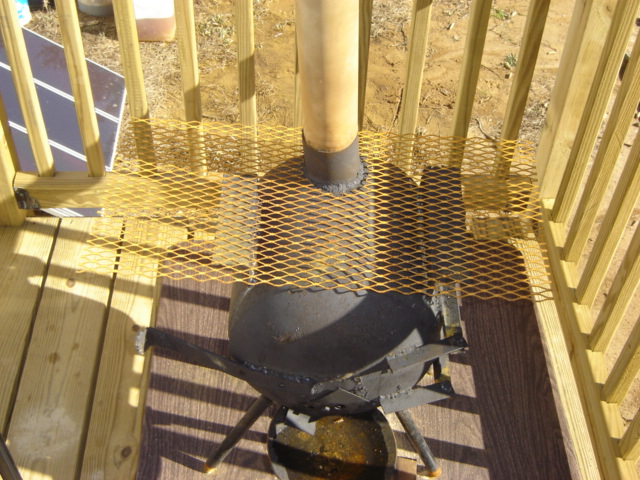
a skillet. At this point I took the high temperature paint and spray painted the entire stove thoroughly. Last
I took some diamond screeening and cut a 3-4" circle opening in the middle of the stove, to one side, so when I put the screen
on the top of the stove, it will go around the stovepipe as well as rest nicely on the top of the stove. At this
point I started another fire in the stove to help cure the paint.
|
| Screen on top of stove to make up cooking surface |
At this point the stove is completed. I placed a fireproof board underneath the stove to help protect the deck
from hot ash and embers since this is where the stove will be used. I have only tried to heat a pot of water once on
this stove, which took a little while, but that was using inferior fuel and not tending the fire often. I'm sure if
I took a little more effort to make a good long lasting hot fire, I can be able to boil water in a shorter amount of time
or even cook something in a skillet. We will surely see in the future.
|


