|
With our moving from a house with a basement in the Chicagoland area to a 16x56 trailer in MS, we quickly decided that
a storage shed would be a necessity to store all the tools and hardware, plus any other crap that we may accumulate for future
projects (damn I miss basements).
There were a few choices as to how to carry out this mission; plastic shed, ready made wood shed, tin shed, or homemade
wood shed. Well you should already know which route we decided to take. Yep, after looking at the plastic sheds
and seeing they were too small, the turn key wood sheds costed too much, and the tin sheds reminded me of some of the rusty
car parts I have lying around outside (all the more reason for this shed!), we decided that a homemade shed was the only answer.
I figured that the cost of the materials should be a mere fraction of what a ready made wood shed would cost. And
unlike some people, I dont totally factor in my labor since my labor doesn't cost me money, I dont need to work overtime to
pay for some expensive shed, I can just use my free time to build one and spend less on building materials.
Even though the shed will be used to store excess stuff that we brought with us from the move down to MS, as time passes
and more crap is disposed of in some way, shape, or form, the storage shed will see a new duty as a supply shed, storing the
goodies that we will use for future projects, while serving lighter duty as a general storage shed.
|
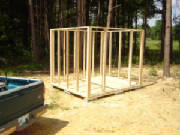
| Walls framed up |
I decided to make the shed with a heavy duty floor, to accomodate ANYTHING. The ready made sheds we seen at Home
Depot had plywood floors, which couldnt be more than 3/4" thick. So, for our floor, 2x10's were used. Several
2x10's were laid side by side and 2x4 boards were nailed across the 2x10's on the ends and in the middle to hold the boards
together. Obviously the 2x4's are underneath. Afterward the walls were framed out one by one, and erected and
nailed in place around the perimeter of the 2x10 board floor. The dimensions of the shed are 8' deep, 10' wide, 7' tall.
The front wall has a large opening in the middle for a large door.
|
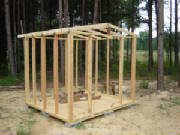
| Frame with roof rafters in place |
At this point we got the roof rafters nailed in position along with the center beam. This was probably the most
fun part of the whole thing so far, especially since we never did anything like this before. Anyway the shed is coming
together.
|
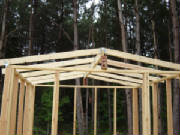
| Closeup of the roof rafters |
This is a closeup of the roof rafters, as you can see I put a couple of bricks under the center beam, which is a 2x6,
to hold the board at the height that I wanted so we can put the 2x4 rafters in place at the right angle.
|
| The shed gets a layer of skin |
At this point we put a plywood skin on the shed frame. The plywood is 1/2" thick, 4x8 dimension boards. The
roof also has its skin too. When I said putting the roof rafters up was the most fun part, I lied, putting plywood up
there was, especially when I had to climb up on the roof to nail the final set of nails on the roof rafter that ran down the
center of the last board, since I couldnt just set the ladder up inside and clime through the roof frame to reach the boards,
like I did with the first three. Anyway, the first layer of skin is on the shed at this point.
|
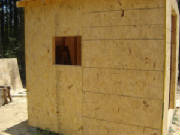
| Window opening cut out of wall |
Since I wanted this shed to at least have a remote feeling of being comfortable, I had to have windows on this thing.
So at this point I hacked out a couple of window holes where I will install my homemade windows. The homemade windows
will be nothing more than 1x2 framed plexiglass panes that are hinged and sealed with weatherstripping and latched in
place. Simple, cheap, serves its purpose.

|
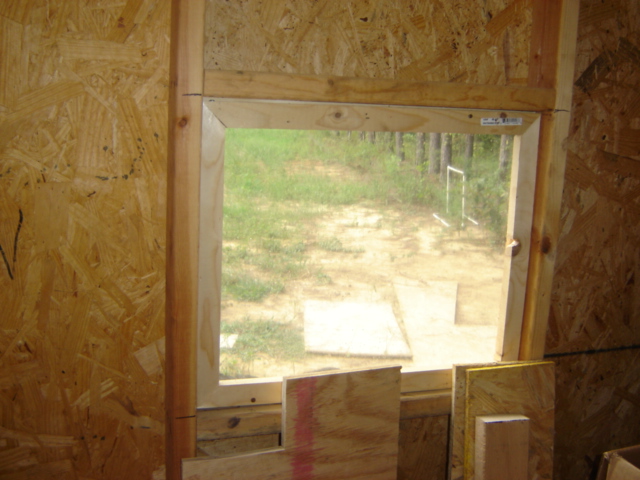
| Interior shot of other window opening |
This interior shot of the second window opening shows the simple framing setup that we did to support the windows.
Basically nailed a couple of 2x4's (salvaged from the wall framing) horizontally above and below the points where the window
opening will be. I drilled a hole in all four corners of the future window from the inside then used the jigsaw to cut
the openings out.
|
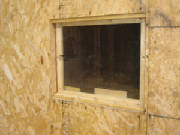
| Window frame w/plexiglass nailed in place |
|
| Inside shot of the window frame with the plexiglass attached |
I decided to make the windows as simple as possible. I ended up making them out of 1 x 2 wood cut with a miter
boxto give me the 45 degree angles to butt together to make a frame, then measured out and cut a piece of plexiglass to screw
onto one side of the wood frame. Afterward I cut two more pieces of 1 x 2 wood and nailed them at the top and bottom
of the window opening to serve as points to fasten the window to. Long wood screws hold the window frame together as
well as attach it to the top and bottom boards.
|
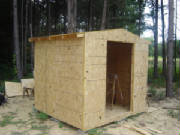
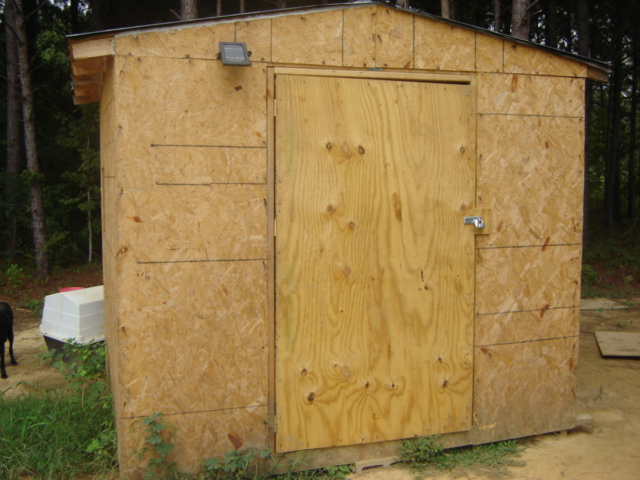
| Front of shed with large wood door in place |
At this point we finally managed to get the door made and hung in position on the shed. The opening turned out
to be a little too wide so I had to cut and nail a couple of 2 x 4's to either side of the doorway to help narrow the opening.
The door is made of a piece of 4' x 8' plywood that was trimmed to make it approximately 7'. I also cut and nailed a
2 x 4 frame to the plywood base to give the door strength as well as a place to fasten the hinges. After putting a frame
on the door we put the hinges in place on one side of the framing so we'll be able to screw the hinges in place without having
the door be too high or low. At that point we hung the door then attached a locking bracket to attach a padlock to.
The lock is one of those hockey puck type locks thats hard to cut through with a bolt cutter. Right now the door is
hung and locked up, but there's still more.
|
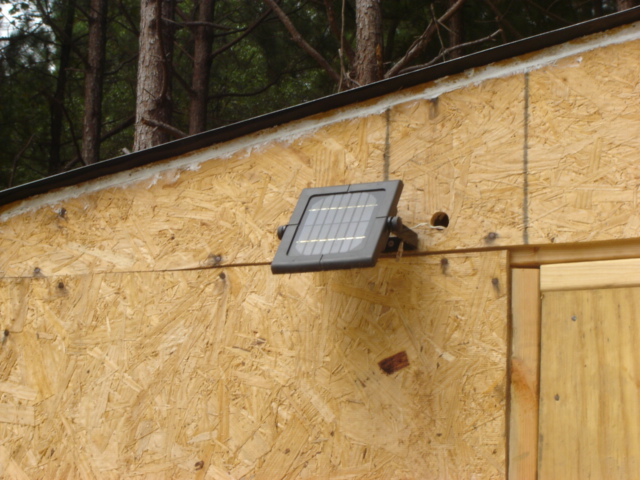
| Small solar panel with batteries contained inside housing for shed light |
|
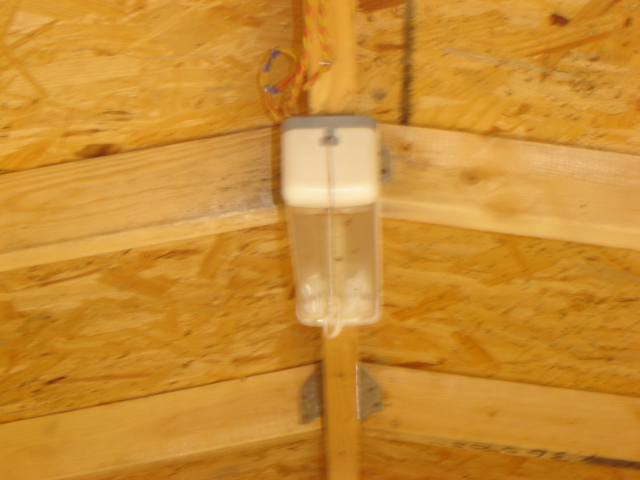
| Low power florescent light attached to ceiling beam in shed |
Even though this was done before the door and windows, I feel its finally about time to mention this little addition
to the shed. Since I didn't want to go through the hassle of running a power line over to the shed just to power a little
simple light, I figured why not get a cheap little solar powered setup to put in the shed to give me the little bit of light
I may find myself using if I go in the shed at night? So I managed to pick up a small solar panel/battery/florescent
light fixture set from Harbor Freight for $20. Unfortunately the fixture had a little tiny button on it to serve as
an on/off switch, unable to reach if the fixture is on the ceiling. So I went about running my own little conduit line
and switch box to switch on the little light from the solar panel. It turned out the florescent fixture that came with
the set was unable to work with all of the extra wiring from trying to re-route power to that light. I ended up taking
one of my low power florescent lights and using that as my donor light for this simple project. I wired the power from
the solar panel/battery pack over to the ballast circuit on the little florescent fixter, making use of conduit and regular
switches and boxes. Now the shed has light, courtesy of the sun!!
|


